Webinars can now be managed from the website by Webinar administrators when logged in to the website's account management dashboard.
To begin:
Step 1: Access through “Manage Subscriptions” in the group's webinar profile to get started.

Step 2: Select the Products Tab, then you can Activate a User or Remove a User.

Activating a User
- If they are already on the list, select “Update,” select the License drop-down and select the correct license to be assigned,
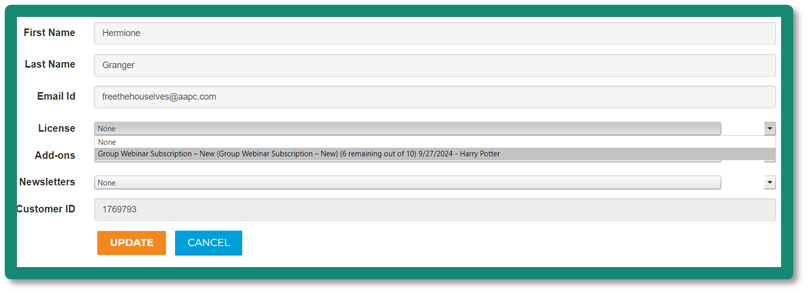 then click on the orange “Update” button to save the changes.
 - If they aren’t on the list, click on “Add new,” add the user information and select the correct license level.
Removing a User
- To remove a user from your subscription organization user list, simply click the "Unassign" link in the row with the user details you wish to remove.

Adding Users in Bulk
Adding users in bulk is an effective way to manage group webinar subscriptions quickly and efficiently.
To begin this process, click the “Add Multiple Users” link next to the “Add New” button on your user list view.

To review instructions on how to utilize the template for the import, click the Multiuser Upload Instructions Link. This will trigger a pop-up that contains detailed instructions on this process.
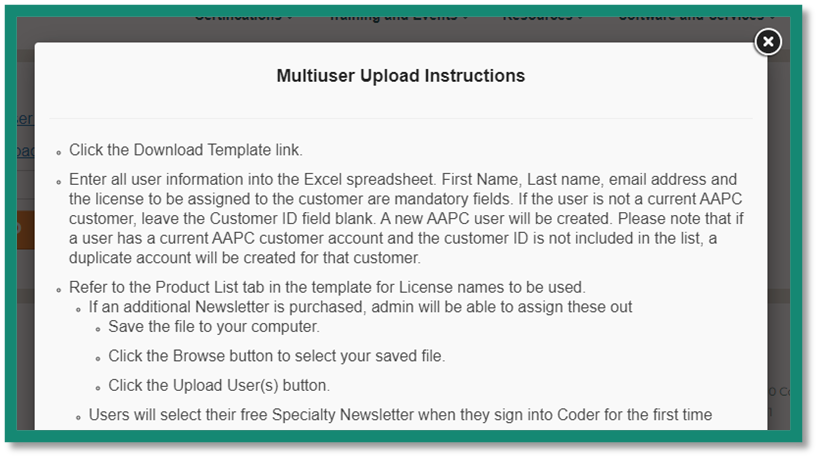
Adding or Removing Users in Bulk
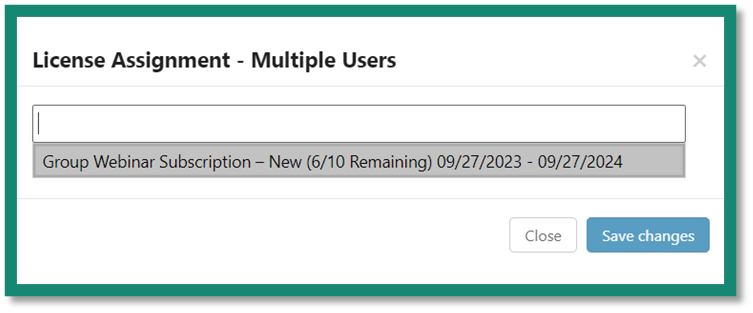
- Click on the “License Administration” tab
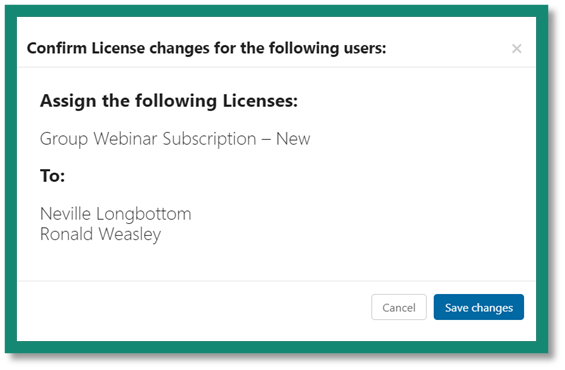
- Select users to add to the license and click on “Bulk License Assignment”
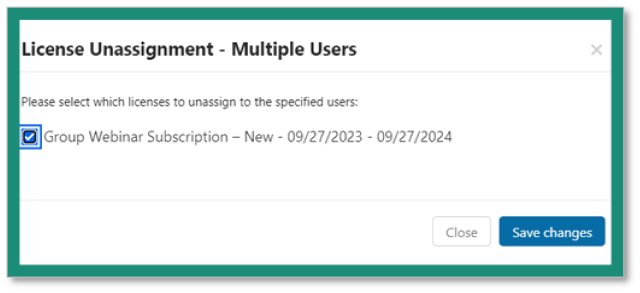
- To remove users, select assigned users and click on “Bulk Unassignment”

Creating and Management of Administrators
To create and manage administrators, follow the steps below.
- Click the Manage Subscription from your My AAPC tab
- Click on the Administrators tab
- Assigning/Adding/Removing Webinar Contacts
- If they are already on the list, select “Assign,” and select the Administration Role drop-down and select WebinarAdministrator, then click on the “Save” button
- If they aren’t on the list, click on “Add new,” add the user information, select WebinarAdministrator, and then click on the “Save” button.
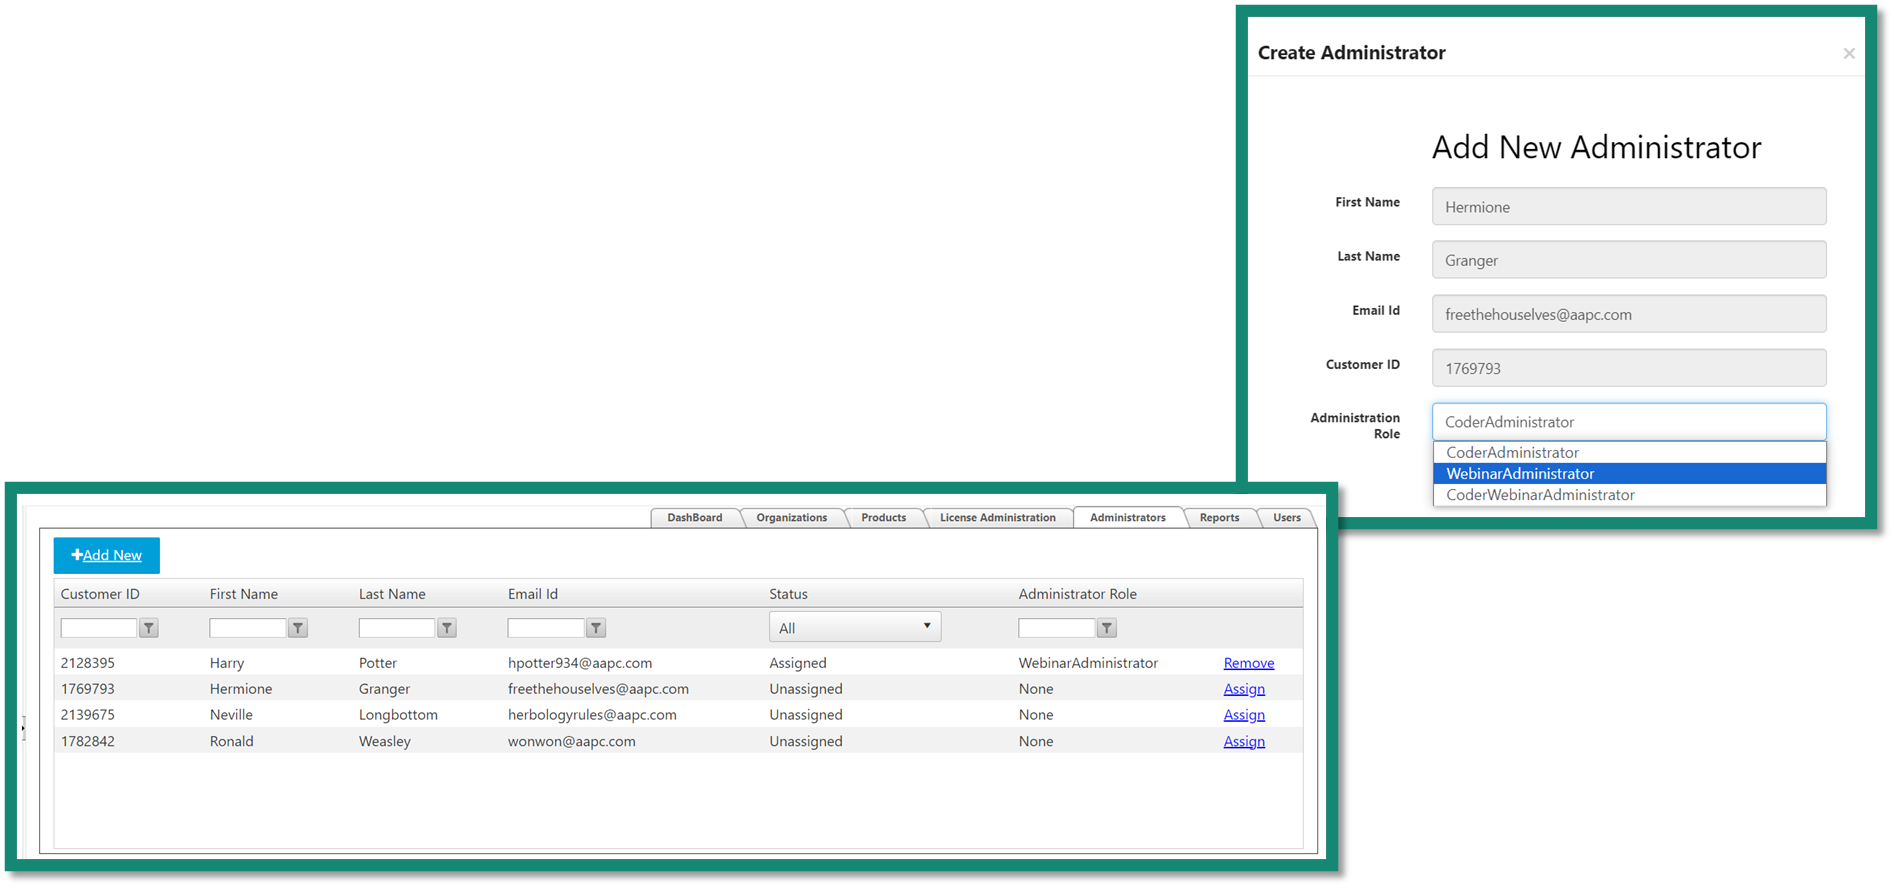
To Remove Admins: To remove a Webinar Administrator, click on “Remove” next to the person needing to be removed